
This guide has everything you need to know about Google AdSense. If you’re new to Blogging, I’ll show you how to get started with Google AdSense on your WordPress website to make money online (Complete beginners guide).
If you are already using AdSense, I’ll reveal advanced tips, tactics, optimization tips, and strategies you can use to get more with AdSense. Bottom line: If you want to get the most out of Google AdSense, you’ll love this guide.
What is Google AdSense?
Google AdSense is an advertising program from Google for publishers and bloggers that allows you to run ads on your website, blog, or YouTube videos and get paid when visitors click on them. This article shares a complete Google AdSense beginner’s guide to making money online from your website.

Creating an Adsense account and getting approval in a very short period of time is not a simple process for new bloggers. If you are one of them and looking for updated tips to create an Adsense account and get approval on the first attempt, then you are in the right place.
In this article, you not only get AdSense approval tips, but you also get the best ad placement and ad size guide to maximizing your AdSense earnings.
Google AdSense has thousands and thousands of satisfied customers and publishers. AdSense pays on time, every time. Its paying rates are better than all of the other networks, so that’s the biggest reason it is so popular among bloggers. Let’s start our Adsense guide to make money online.
How to create a Google AdSense account?
creating a Google AdSense account is quite easy. All you need is a website and a Google account (obviously). Below is a step-by-step guide to opening your AdSense publisher account.
Now, if you don’t have any website for AdSense approval, then I recommend you to start a WordPress website at Bluehost hosting. They offer a one-year free domain name with their WordPress hosting.
Step 1: Open Adsense.com click on the “Get Started” button and sign in with your Google account.

Step 2: Now enter your website URL & select your country. Make sure you use the same website URL where you can show Adsense ads. After entering all details, click on the “Start using AdSense” button. Then accept Google AdSense terms & conditions.

Step 3: Here you’ll get three options, you can enter payment information, view ads preview, & connect your site to AdSense. Click on the “Connect your site to AdSense” opinion. You can enter your payment information later.

Step 4: Now, you have to verify your website ownership. Adsense offers you a custom verification script you have to put on your website header section. Copy and paste this code on your site’s <head> and </head> tags.

On your WordPress website, install & activate the “Insert header and footer” plugin. So, you don’t have to edit your website core code. After that, open the WordPress dashboard>Settings>Insert Header And Footer. Then paste that copied verification script and click on “Save changes.”

And Done, you have successfully created your Google AdSense account. The review process can take several days to a couple of weeks. Be patient and wait for the review process to complete.
Once your AdSense account is verified, fill in your identity verification, address verification, and payment methods.

Make sure you put all the right verification information. Because after making $10, the AdSense team sends a verification code to your address. After filling in all information, click on the “Submit” button to continue the process.
If your Google AdSense account isn’t verified, here are some tips to help increase your chances of getting approved for a Google AdSense account:
Google AdSense Account Approval Process
There are many other parameters the Google AdSense Approval Team looks for; before approving your account. Keep in mind that AdSense has a very strict policy, so following those tips will not guarantee your account to be approved, however, if you follow them, your chances of getting approved will be much higher.
Below is some Google AdSense approval checklist that I managed to collect with all the websites and I get approval every time using them as guidelines.
1: User-Friendly Interface
Google always looks for a clean, informative, and user-friendly website interface. You should use a fast-loading mobile-friendly theme for your website with a clear navigation menu & breadcrumbs to help your visitors & Google bot find important pages.
I recommend you use the GeneratePress or Astra WordPress themes, both are freemium & SEO-friendly. On my site, I personally use the GeneratePress theme, it comes with a super-fast loading speed with a proper navigation menu & breadcrumbs options.
The better your website looks and works more the Chance to get AdSense approved for your Site. For website speed optimization you can use the WP Rocket or FlyingPress cache plugin.
2: Publish Unique Content
AdSense doesn’t approve blogs with copy-pasted copyright content. Write some unique, high-quality, in-depth, and well-optimized blog posts with above 600-800 words. If your website content is poorly written (non-SEO Friendly) and has grammatical mistakes Google will reject the blog right away.
You can use the Rank Math SEO plugin for on-page SEO to optimize content & Grammarly for checking plagiarism and grammatical errors. Your website should have enough content with a Meta Title and Description Tag. This is not an official declaration but If you have 15-20 SEO-friendly blog posts, then you get a higher chance to get approval.
3: Create Terms, Disclaimer, & Privacy Policy Page
You have to create some pages on your website before you apply for AdSense. Make sure you have proper Terms & conditions, disclaimer, privacy policy, and contact us page before you apply for AdSense.
You don’t have to hire a professional lawyer to write and privacy policy page. There are a lot of websites available that can help you create Terms, privacy policies, & disclaimer pages with just a few clicks. If you are using WordPress then you can WP Forms, Ninja Forms, or Gravity Forms plugins to create a nice-looking Contact Us page without any coding experience.
4: Don’t Use New Domain Name
Apply for AdSense when your website gets a minimum of 30 days old. Old authority websites get approval within 24 hours. It doesn’t mean a new website with quality content & organic traffic is not eligible for AdSense. Be honest about the information provided in the application and make sure that the website information and contact info are accurate.
Don’t use any free domain & hosting services for your website. Currently, Google doesn’t approve blogs with some free domain extensions. If you don’t have a domain name & hosting, you can use Bluehost hosting, they offer free domain names for one year. Explore Bluehost hosting.
5: Follow AdSense policy
Carefully review AdSense’s program policies before applying for an account. Make sure that your site does not contain any prohibited content, such as adult content, copyrighted material, or illegal activities.
There are a few basic things you need to know before you apply for AdSense:
- Make sure your age is 18+ because you have to verify your identity.
- You have to connect your website search console, Google Analytics, and Make a Proper Sitemap, robots.txt, and submit it to Google webmaster tools.
- You have to remove other companies’ Ads from your website before you apply for AdSense.
- Make sure you using AdSense-optimized themes on your WordPress website before applying for AdSense approval.
- During AdSense verification, use your own personal information & address.
6: Get Organic Some Traffic
It’s important to get some organic traffic before applying. Adsense will want to see that your website is not brand new and that there is already some audience interested in the content you have. To increase Organic traffic, focus on Long tail keywords, share your post on various social media platforms, etc. You can use the Semrush tool to find the right keywords & SEO mistakes.
After maintaining a blog by following all the tips mentioned above, you can apply for Google AdSense and quickly get AdSense approval for your new blog.

How to create a Google AdSense Ads unit?
To show ads on your site you have to create a new “Ads unit” or you need to use Auto Ads. I recommend you use a custom Ad unit to show ads, it increases your earnings.
Step 1: Open your Google AdSense account, And click on the “Ads” options from the Left sidebar menu to create an Ads unit. On the Ads Overview page, click on the “By ad unit” option to create a new responsive or custom-size ad unit.

Step 2: Now select which types of Ads you want to show on your website. AdSense recommends we use “Display Ads” for better performance. Select your ad type and click on it.
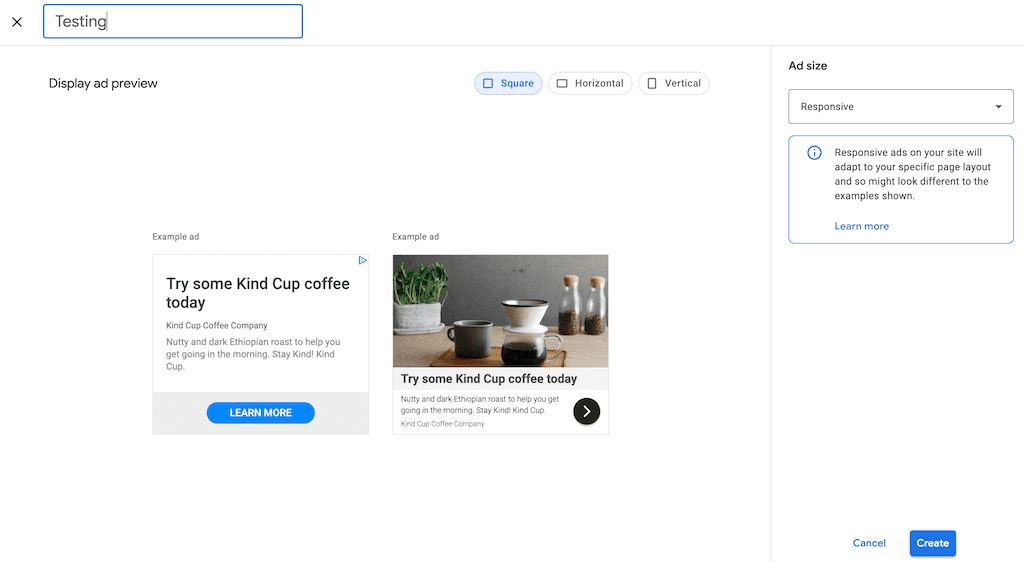
Now you have to enter your Ad name & size. Google always recommends using a responsive ads unit, but you can also use different sizes of ads. After selecting all details, click on the “Create” button to continue.
Step 3: Now, you get a custom AdSense ad code. Copy the code snippet and enter the code where you want an ad to appear.

That’s all. I hope you learned you to create Google AdSense ads units easily. You can use this ads unit for tracking which ads perform well on your website.
How to Set Google AdSense Auto Ads?
Google Auto ads are utilizing AI to automatically manage ad sizes, placements, and ad speed optimization for publishers. Auto ads are best for you if you want to show ads on your website, by putting only one code on your website header. Let’s check how you can show auto ads on your website.
Step 1: Open AdSense and click on the “Ads” options from the left sidebar menu. Here, on the “By Site” tab, select your website URL where you want to show auto ads and click on the edit option to customize auto ads.

Step 2: Here you can see a live preview of AdSense auto ads. First, Turn on the “Auto ads” option and then turn on the “Optimize your existing ad units” option if you’re interested in letting Google optimize your existing ad units.

Step 3: Then, select Ads formats you can show on your website. Adsense auto ads offer In-page ads, Anchor ads, Side rails ads, etc. Select which types of ad formats you want to display on your website and click on the “Apple to site” button.

That’s all. After a few minutes, Google Adsense automatically shows ads on your website.
Best Performing Adsense Ads Sizes & Placements
Google AdSense supports a variety of ad sizes. Optimizing your website’s Google AdSense ads is a great way to generate more ad revenue. We’ve found AdSense earning a direct correlation between the number of ad sizes and placements.

Here are the top highest-performing Google AdSense banner sizes and formats to maximize your AdSense earnings.
- 336 x 280 Large rectangle ads: It Performs well when embedded within text content or at the end of articles. Due to its size and ideal placement next to the content.
- 300 x 250 Medium rectangle ads: It Performs well when embedded within text content or at the end of articles. Medium rectangle ads ad format supports both display & text ads. This ad unit fits in the sidebar or inside the content area.
- 728 x 90 leaderboard ads: Performs well if placed above main content, tablet-optimized pages, and on forum sites. It supports both text and image ad formats & it’s ideal to be placed on top of the website.
- 160 x 600 wide skyscraper ads: It’s a vertical banner ad that is designed specifically for narrow sidebars. You can place the Wide Skyscraper in the sidebar or next to the content for the best results.
How not to get your AdSense account banned?
Google has its own AdSense Policy guide, that can teach how to avoid banning in case of phishing activities done by you or other website visitors. Make sure you read Google guidelines, here are a few common mistakes made by beginners.
1: Ads Click & impression: Don’t click on your own Google ads or don’t ask anyone to click on your AdSense ads. Also, you can’t encourage anyone to click on AdSense ads in any way, such as by using phrases like “Take a look at our sponsors”. Last year, I got banned from Google AdSense due to invalid click activity. Here’s a screenshot:

You can use the “AdSense Invalid Click Protector” plugin to save your Google AdSense account from unusual invalid click activities and click bombings. With this plugin, you can set the maximum ad click limit, Block any visitor if he exceeds the mentioned click limit, and you can also block specific IP addresses.
2: Content Policy: You have to Create sites with unique and relevant content. Google AdSense does not allow content that promotes illegal activity, Endangered or threatened species, Dangerous or derogatory content (like Promoting hate groups or hate group paraphernalia, harassing, intimidating, or bullies), Misrepresentative content like “Phishing”, and Malicious software download link, explicit content, etc.
You can read the complete Google Publisher guidelines for more information. Google does not allow gambling-related content to display AdSense advertisements.
3: Ad implementation: Google recommends publishers try out different ad placements, and layouts on their site to maximize earnings. But you can’t place ads on such places as sticky widgets, pop-ups, emails, or software.
AdSense allows us to display a maximum of three ad units on one specific page. If you are using more than three ads on a single page, you can get banned. Or you can use Wp Buffs WordPress care to optimize your website for AdSense.
How to Add Google AdSense to WordPress?
There are many ways to add AdSense to your WordPress website. The easiest way to add Google AdSense to your WordPress website, you use a WordPress plugin or manually add the AdSense code to your website.
Many WordPress plugins can help you add & manage AdSense ads without any effort. I recommend you use the “Advanced Ads” plugin to display an unlimited number of ads, rotations, and placements.

With the Advanced Ads plugin, you can create unlimited ad units, automatically inject ads into specific areas, schedule ads, see Real-time ad performance, A/B Testing, etc. And the best part is you only need 1 minute to set up AdSense ads on your WordPress website.
However, if you want to use AdSense auto ads on your website, then you don’t need to use any WordPress plugin. Just enter the AdSense auto ads code in between the <head></head> tag of your website.

FAQs about Google Adsense
Here are some most asked questions about Google AdSense. If you have any other questions about AdSense guidelines, CPC, CTR, or payment related then let me know in the comment sections.
When does Google AdSense pay?
If your AdSense balance exceeds the payment threshold of $100 and you have no payment holds, you’ll be issued a payment between the 21st and the 26th of the month.
How does Google AdSense work?
AdSense matches ads to your site based on your website content and visitors. You get money when your website visitor clicks on the ads. Once you get to a minimum threshold of $100, you’ll get paid via wire transfer.
How does Google AdSense pay you?
AdSense has different payment options for different countries like EFT transfer, Wire transfer, Cheque facility, and pay by Western Union Quick Cash.
How many visitors are needed for Google AdSense?
There are no minimum visitors required for getting AdSense approval. If you have a blog with only 250 organic visitors per day, it works fine.
How much does Google AdSense pay?
How much money you will make from AdSense depends on the amount of traffic your website receives, website users’ locations, CPC, CTR, ad sizes, etc. If you get the majority of traffic from the USA, Canada, or the UK, then you can earn more money.
Where to paste Google AdSense code in WordPress?
You have to paste the AdSense code to the WordPress website header section. You can use the “Insert header & footer” plugin to paste AdSense code on your WordPress website.
Final Thoughts
I hope you like our Google AdSense Guide. Google AdSense is one of the oldest & trusted ad networks that offer ad publishing and works at the PPC (Pay-per-click) system. Its paying rates are better than all of the other networks like Media.net. So that’s the biggest reason Adsense is so popular among bloggers & digital marketers.
Do you have any further questions about Google Adsense or blogging tool guides? Let us know in the comments section below or contact me. I’d be glad to reply!
Are you using Adsense? What are your experiences with Adsense? Let me know in the comments below! Find this Guide useful? Share it with your friends!
Read more about:
- Best AdSense alternatives for Bloggers.
- Grammarly premium review.
- Best Chrome extensions for Bloggers.
- Top 10 Fastest WordPress Themes.
Thank you. Have a lovely day.
